Last year I wrote a post on an issue attempting to install the DELL EqualLogic Multipathing Extension Module using VMware Update Manager. I discussed an alternative method to VUM using the CLI to install the MEM. The post has turned out to be fairly popular. I’m guessing though that most people are more interested in how to install the EqualLogic MEM using VUM rather than my original workaround. So I thought I would run through the steps using a version of MEM that now works. The whole process of importing, attaching, and remediating came out a little longer than expected but I managed to capture all the steps in what I think is fairly easy to follow.
The version of MEM I am using is 1.1.2 (released Dec 2012). You can obtain it from the EqualLogic support site (sign-in required). The release notes state that the only change from version 1.1.1 is that it’s now compatible with Update Manager 5.1. EqualLogic also state that if version 1.1.1 is installed 1.1.2 is not required. At least this now explains why I had trouble with VUM and version 1.1.1
Using the vSphere Client under Solutions and Applications select Update Manager and click on the Patch Repository tab.
Click on Import Patches. Browse to the location of the patch. Select the version you want. In my case for ESX5
*Note: The ZIP file from the EqualLogic support site needs to be extracted prior to importing. Once extracted there will be two zip versions. An ESX4 and an ESX5 version.
If the Upload is successful you’ll then be asked to confirm the Import.
Once imported scroll to the bottom of the repository list and you should see the new Host Extension.
With the extension imported into Update Manager we now create a new Baseline. Click on the Baselines and Groups tab.
Click on Create to create a new baseline. Assign a name to the baseline and a description. For the Baseline Type select Host Extension and click Next.
Scroll to the bottom of the list and select the recently imported MEM patch. Click the down arrow to Add the Extension and click Next.
Confirm that the correct extension was selected and click Finish to create the baseline.
With the patch imported and a new Baseline created for the Extension we now have to Attach the baseline. This can be done at the top of the vCenter level or right down to the Host level. In this case I just want to do a single host. So I’m going to select the host and then select the Update Manager tab. I’m then going to click Attach.
Select the newly created baseline and click Attach.
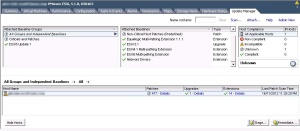
The baseline will now appear with a Question Mark beside it until a new scan is performed. Click Scan, make sure Patches and Extension are selected and click Scan again.
Once the scan is complete the Extension will now show up with a red cross signifying that it’s missing and needs to be Remediated.
Click the Remediate button to start the process. Select Extension Baselines on the left and the recently created Baseline on the right. Then click Next.
Omitted is a number of steps from the Remediate Wizard. The options revolve around how the host and cluster will behave in Maintenance Mode. The options are fairly straight-forward and the default options usually suffice. The last screen will summarise the options selected. Make note what options have been selected and that the correct Baseline is selected. Click Finish to start the Remediation.
The host will now enter Maintenance Mode using the options you selected above. Once complete we can select a datastore and select pathing where we can see a new pathing option and it’s selected by default. We will also see that all paths to the LUN are Active.
The whole importing and creating a baseline can seem a little tedious at first, but once done, all that’s needed is a scan and remediate on new hosts.
References
Link to original article EqualLogic MultiPathing Extension Module -- Alternative Install
Download the latest Extension module from EqualLogic Support Site


1 thought on “EqualLogic Multipathing Extension Module – Installing”