For some time now NetApp have supported VAAI for NFS on vSphere. If you’re using NFS on your NetApp with vSphere you might want to investigate installing the NFS Plug-in for VMware VAAI.
The plug-in helps vSphere communicate with NetApp basically allowing it to offload certain tasks from vSphere to NetApp. By passing certain tasks off to the NetApp, tasks can be processed faster and communicated back to vSphere when complete. An example is provisioning a VMDK file or performing a vMotion task. Rather than vSphere attempting to perform these tasks over the wire they can be performed directly on the NetApp by the array itself.
There are three different ways to get the NFS Plug-in installed onto an ESXi host. I’ve detailed the three different options below. Before you start you’ll obviously need the NFS Plug-in which can be downloaded from the NetApp support site. You’ll need a login ID and a valid support contract to do this.
Option 1. ESXCLI
This is my preferred option when only needed for a few hosts. It can be done on the actual ESXi host (e.g. ssh) or via the vMA.
Step 1. Copy the NFS plug-in zip file to a location that the ESXi host has access to. Below I copied the file to a folder called ‘vib’ on a test datastore.
Step 2. On the ESXCLI run the following command.
esxcli --server HOST_IP_ADDRESS software vib install -d /PATH_TO_VIB/vib_filename_.zip
Step 3. Reboot the host
Step 4. Check that the NFS plugin was installed with the following command. Scroll till you find NetAppNasPlugin under Name.
Option 2. VMware Update Manager
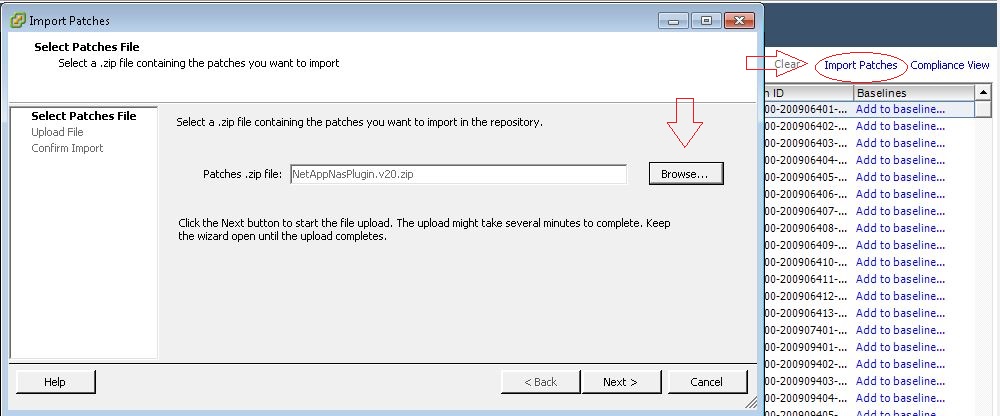
Step 1. Install the Plug-in into the Patch Repository. Click Import Patches and Browse to the location of the Plug-in zip file.
Click Next and ignore any certificate warning you may get to Import the patch.
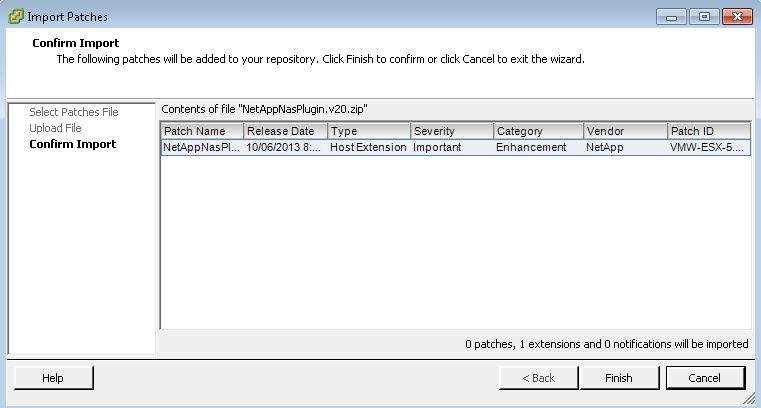
Click Finish to finish the Import.
You should now see the NetAppNasPlugin in the Patch Repository list.
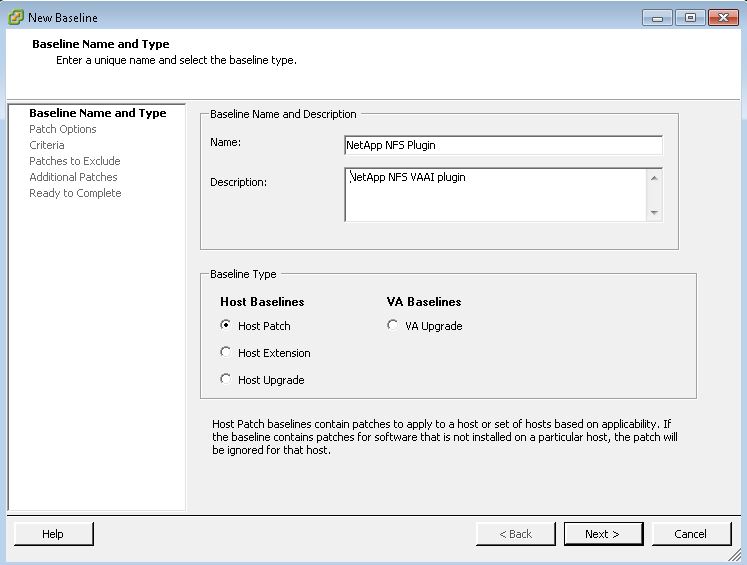
Step 2. Create a new baseline for the NFS Plug-in.
Click on Baseline and Groups. Right click to create a New Baseline. Fill in the Name and Description and select Host Patch.
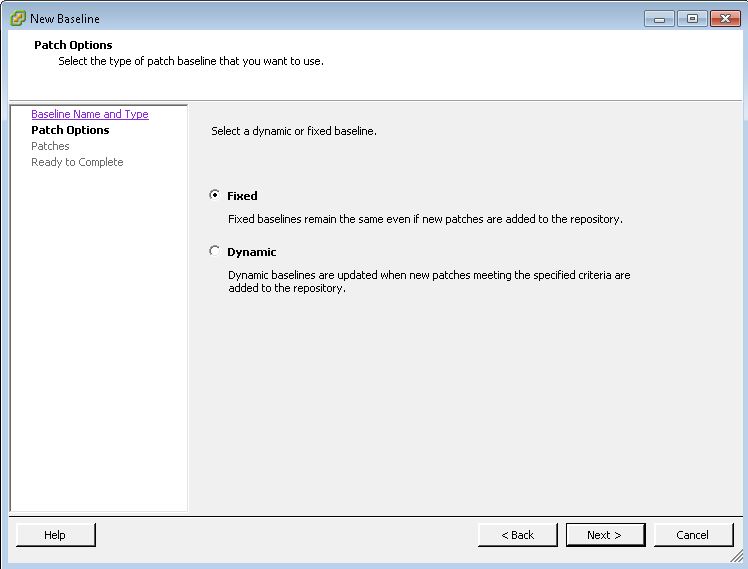
Click next and select Fixed.
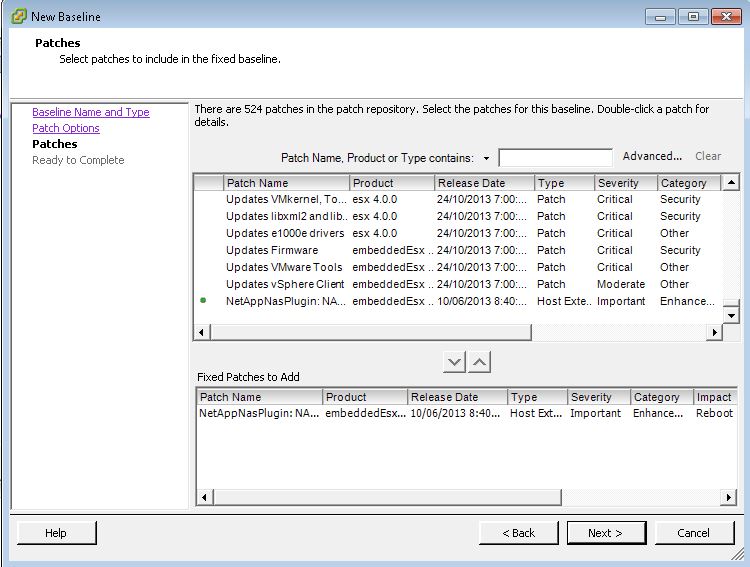
Scroll through the list of patches and locate the NetAppNassPlugin. Add the patch using the down arrow and click next.
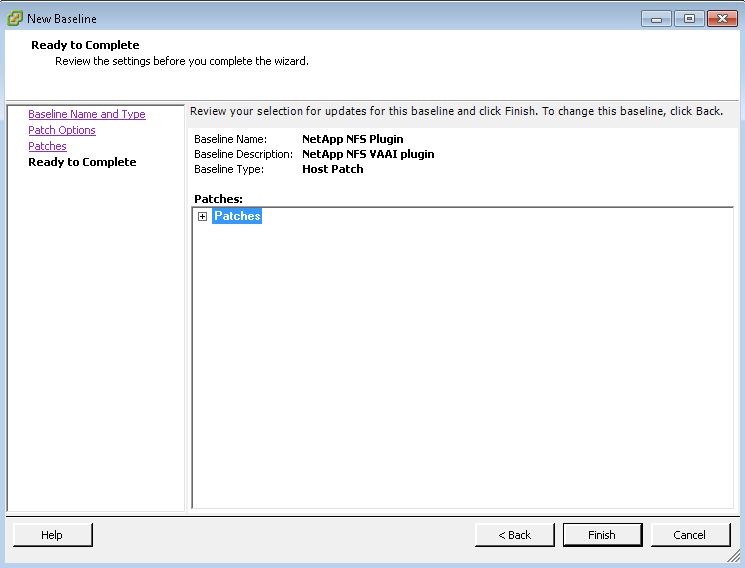
Click Finish to install the patch.
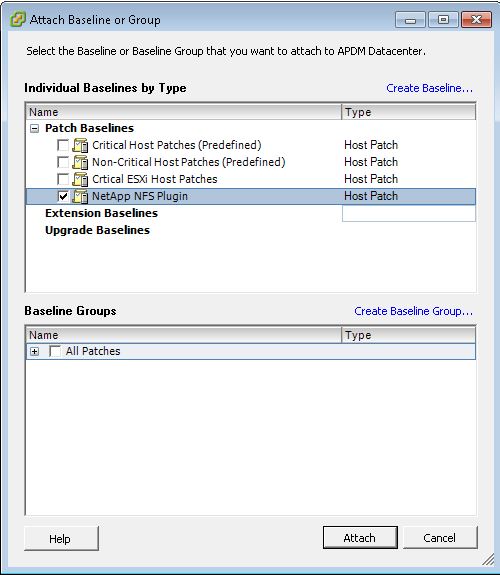
Step 3. Attach the newly created Baseline to your hosts. Where you choose to do this is up to you. I choose to do it at the Cluster level.
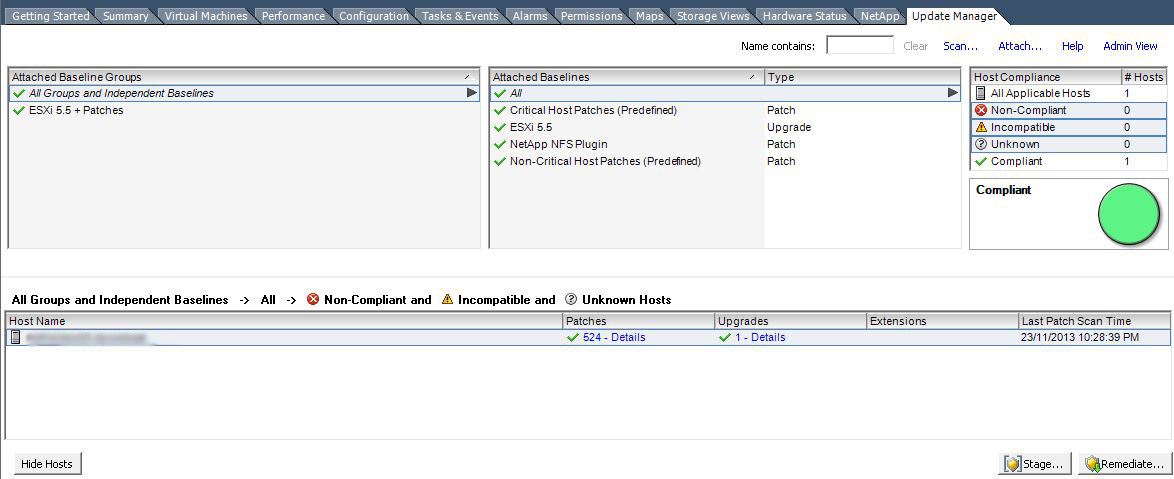
Step 4. Once attached Scan and Remediate your host.
Option 3. NetApp Virtual Storage Console
This option is obviously dependant on you having already installed the Virtual Storage Console on a server and having the vSphere Plugin enabled.
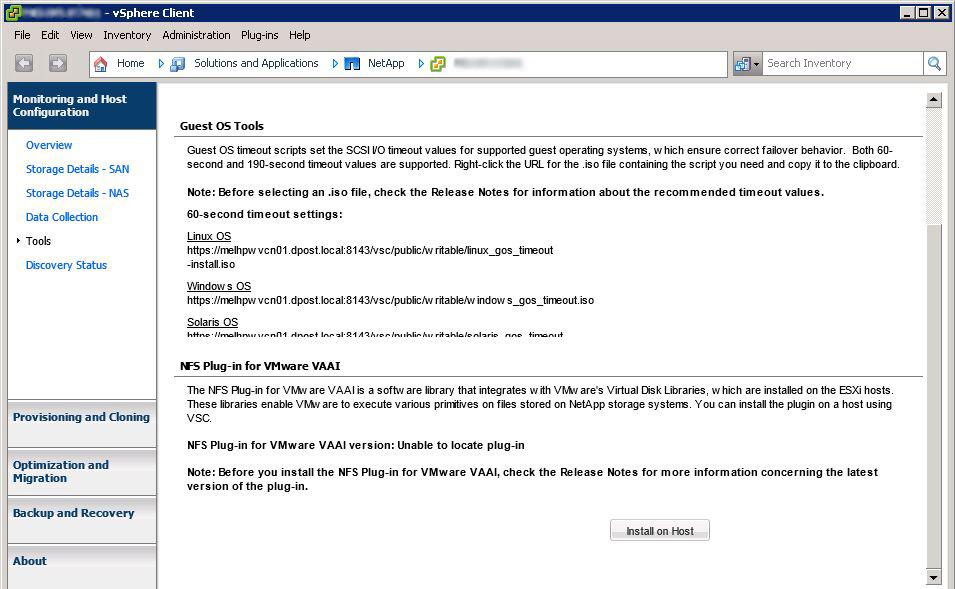
If correctly installed the NetApp VSC can be found under Solutions and Applications called NetApp.
Navigate to Monitoring and Host Configuration and click on Tools. Under NFS plug-in for VMware VAAI it will say Unable to location plug-in.
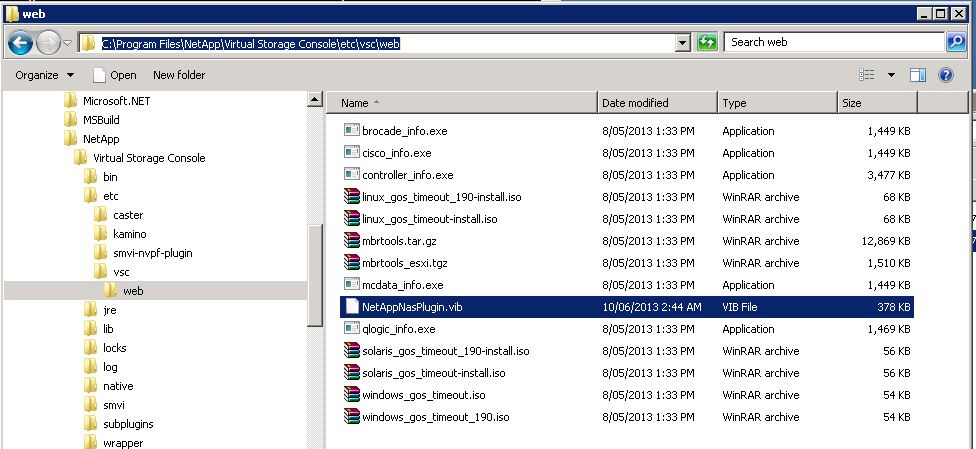
Step 1. Extract the NFS zip file and locate the vib inside it. The vib will be denoted with a version number at the end. Make a copy of the file and call it NetAppNasPlugin.vib
This specific filename is required for the VSC to detect the vib correctly.
![]()
Step 2.
On the server where the Virtual Storage Console was installed. Copy the renamed file to C:Program FilesNetAppVirtual Storage Consoleetcvscweb
Step 3. Exit vCenter and log back in. Open the VSC back up. If the vib was renamed correctly and copied to the correct location. The VIB should now be detected under Tools of Monitoring and Host Configuration.
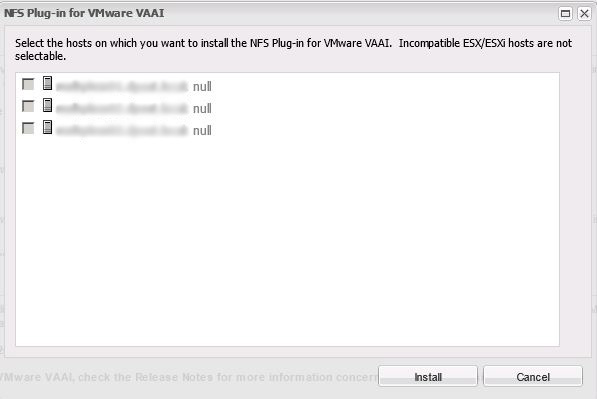
Step 4. Click on Install on Host to install the VIB plug-in. Any incompatible hosts will show up greyed out with a null besides there name.
In the below screenshot I have three incompatible hosts.
So there you have it. Three different ways to install the NetApp NFS Plug-in onto an ESXi host and three different pain in the ass ways.
Good Luck.


