I finally got around to setting up VMware’s Dump Collector. It was so ridiculously simple I don’t know why I didn’t do it before. I guess, let’s be honest, you’ll probably never need it. ESX nowadays is pretty stable and if something does go wrong it’s usually just easier to wipe and refresh then to troubleshoot.
The the less I decided to set it up. The benefit of setting up a dump collector would primarily be for support. If you ever face a Purple Screen of Death (PSOD) and log a support call. You’ll probalby be asked for a core dump. This would usually be held on the local partition of the host. If you use the Dump Collect to can actually direct this output to a network location for easy access.
Below are the steps I took to set this up.
1. Install the Dump Collector
Before configuring the ESX hosts you need to actually install the Collector that will act as the repository for any system dumps from ESX. This can be found on the VMware vSphere 5.0 Installation image. I chose to install this on our vCenter Server but you can install it anywhere.
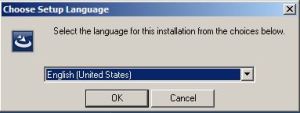
2. Choose Language.
3. Start Wizard
4. Accept Agreement
5. Accept License
6. Chose where to install to program data and where to store the repository.
I chose to keep all default settings.
7. Setup Type
I chose to Integrate with my vCenter and selected the second option.
8.vCenter Information
Enter the address of your vCenter server. Leave the default port unless you changed it during your vCenter installation. The username you use here will be the account that will run the service. You can use a local account on the server or if running AD probably recommended to create a standard AD account and run it off this.
9. Port Settings
6500 is the default port and is fine to accept and click next.
10. Select an Interface on the Dump Collect to use.
11. Install
12. Finish
That’s it! Simple. Now we go and configure our ESX hosts to send to this collector.
Configuring the ESX Host
Configuring the hosts are pretty easy too. You can go to the local host but I found that too much trouble to get a terminal screen, enable the shell, run the commands, and turn off the shell. Instead go get the vCLI (if you don’t already have it) and do it from your desktop.
It’s two simple commands.
The first command configures the host to send its dumps to the collect using the vmkernel interface 0
esxcli –s ESXHOSTNAME system coredump network set –interface-name vmk0 –server-ipv4 192.168.48.135 –server-port 6500
This second command then enables the setting just made.
esxcli –s ESXHOSTNAME system coredump network set –enable true
This last command verifies what you have just set.
esxcli –s ESXHOSTNAME system coredump network get
During each of the commands you’ll be asked for a username and password. Enter in a privileged account on the ESX host.
..and you’re done.
There is one note worth mentioning. Dump Collector only works on Standard Switches. If you run only Distributed Switches it will not work on those hosts. There are alternative methods for System Dumps on these Hosts which I’ll detail at a later stage.


Thanks for the article ..
On the eight point it returns an error to me stating bad username and password. I am able to access the VC server via Windows UNC path.
I have also tried changing the password couple of times but no go any suggetion
Thanks